Sunday, September 4, 2016

Authentication for Single Page JavaScript Application with WSO2 Identity Server

Introduction

When it comes Authentication you may heard about many protocols. SAML, OpenID, WS-Federation passive are some of them. Now a days OpenID Connect is the most emerging authentication protocol and it has been built on top of OAuth 2.0 protocol. OpenID Connect allows clients of all types, including Web-based, mobile, and JavaScript clients, to request and receive information about authenticated sessions and end-users.
 OpenID Connect contains bunch of specifications namely

  • Core – Defines the core OpenID Connect functionality: authentication built on top of OAuth 2.0 and the use of Claims to communicate information about the End-User
  • Discovery – (Optional) Defines how Clients dynamically discover information about OpenID Providers
  • Dynamic Registration – (Optional) Defines how clients dynamically register with OpenID Providers
  • OAuth 2.0 Multiple Response Types – Defines several specific new OAuth 2.0 response types
  • OAuth 2.0 Form Post Response Mode – (Optional) Defines how to return OAuth 2.0 Authorization Response parameters (including OpenID Connect Authentication Response parameters) using HTML form values that are auto-submitted by the User Agent using HTTP POST
  • Session Management – (Optional) Defines how to manage OpenID Connect sessions, including postMessage-based logout functionality
  • Front-Channel Logout – (Optional) Defines a front-channel logout mechanism that does not use an OP iframe on RP pages
  • Back-Channel Logout – (Optional) Defines a logout mechanism that uses back-channel communication between the OP and RPs being logged out
And for Client Implementations
 OpenID Connect core specification is about End-User authentication and basically it describes about two main flaws namely

    1. Authentication using the Authorization Code Flow
    2. Authentication using the Implicit Flow

respective client implementations are Basic Client implementation and Implicit Client authentication.

Most suitable mechanism for JavaScript applications is Implicit flaw because JavaScript or browser based application cannot securely store authorization code and client secret.

Here I explain Authentication for Single Page JavaScript application with WSO2 Identity Server.

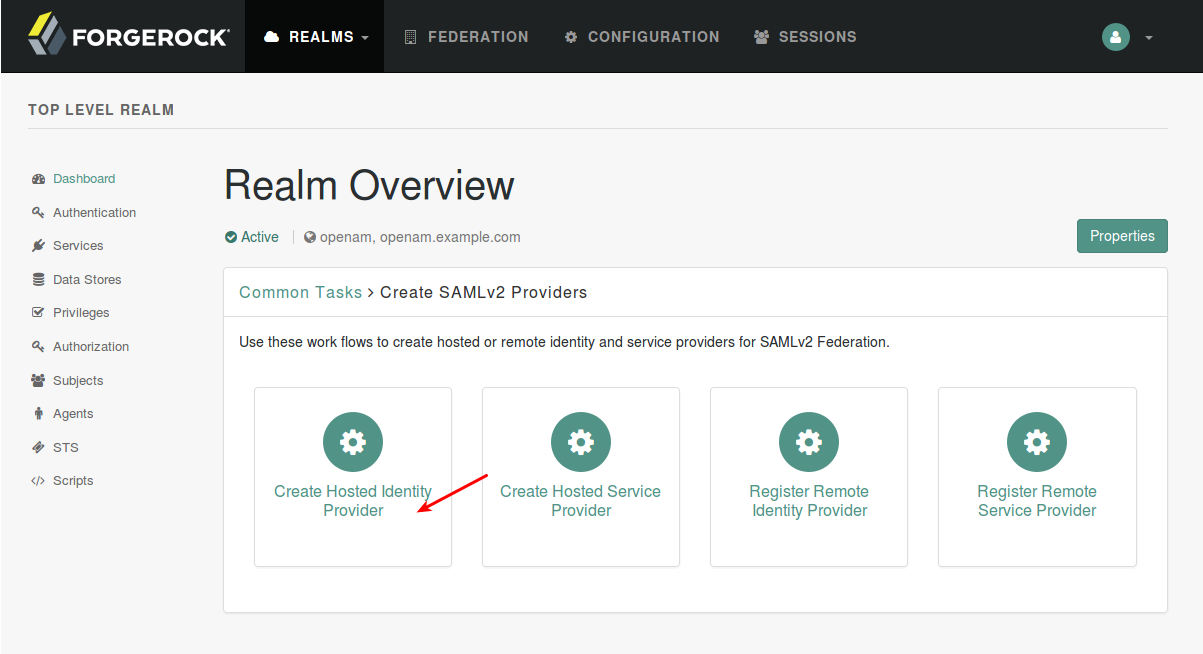
Step-01 Register Service provider in Identity Server 


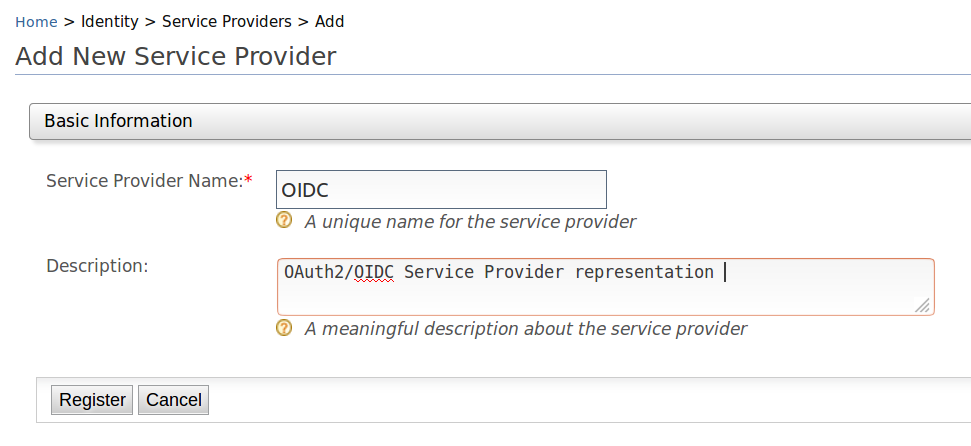
Provide accessible URL. Here I am using "http://localhost:8000"


Now you can obtain Client Key and Client Secret


Step-01 Implement browser based JavaScript application 

You can copy below code segment to index.html file and put into that into some folder like "web". Now you can start a simple python server with below command.
"python -m SimpleHTTPServer 8000"

<html>
<head>

<script>

  function gup1( name, url ) {

    if (!url) url = location.href;

    name = name.replace(/[\[]/,"\\\[").replace(/[\]]/,"\\\]");

    var regexS = "[\\?&]"+name+"=([^&#]*)";

    var regex = new RegExp( regexS );

    var results = regex.exec( url );

    return results == null ? null : results[1];

  }


  var outString="";

  var idToken = gup1('id_token');

  if (idToken!=null) outString = (JSON.parse(atob(idToken.split(/\./)[1])));

  if (idToken!=null) console.log(outString);

  if (idToken!=null) alert("Hello "+outString.sub);

</script>


</head>

<body>

<a href="http://localhost:9763/oauth2/authorize?response_type=id_token&scope=openid&nonce=1234&client_id=D4TlFF1muYo18BEABpF054ul2HAa&redirect_uri=http://localhost:8000">click</a>

</body>

</html> 

Step-03 How it works. 

Access the resource "http://localhost:8000"


Enter  user name and password.


Now you can see Authenticated User.


Sunday, August 28, 2016

OpenAM SAMLv2 Federation with WSO2 Identity Server

Any Identity Provider which is adhere to open standards like SAML, OIDC, WS-Fedration, OpenID can be registered as an Identity Provider in WSO2 Identity Provider. Here I explain how to register OpenAM as an Identity Provider in WSO2 Identity Server.

1. Download and configure OpenAM according to the instruction provided in [1]

2. Login to OpenAM management console with

    username: amadmin
    password: changeit


3. Select top level Realm


 4. Select "SAMLv2 service providers"


 5. Select "Create Hosted Identity Provider"


6. Fill Identity Provider information

Name: OpenAM_IDP
Sining Key: test
New Circle of Trust: CT1

Name in Assertion: http://wso2.org/claims/emailaddress
Local Attribute Name: mail


7. Register a Remote Service Provider

8. Fill Service Provider configurations

Upload below meta data file

<EntityDescriptor entityID="wso2" xmlns="urn:oasis:names:tc:SAML:2.0:metadata">
    <SPSSODescriptor AuthnRequestsSigned="false" WantAssertionsSigned="false"  protocolSupportEnumeration="urn:oasis:names:tc:SAML:2.0:protocol">
        <SingleLogoutService Binding="urn:oasis:names:tc:SAML:2.0:bindings:HTTP-Redirect"
                            Location="https://localhost:9443/commonauth"
                            ResponseLocation="https://localhost:9443/commonauth"/>
        <SingleLogoutService Binding="urn:oasis:names:tc:SAML:2.0:bindings:HTTP-POST"
                            Location="https://localhost:9443/commonauth"
                            ResponseLocation="https://localhost:9443/commonauth"/>
        <SingleLogoutService Binding="https://localhost:9443/commonauth"
                            Location="https://localhost:9443/commonauth"/>
        <NameIDFormat>urn:oasis:names:tc:SAML:2.0:nameid-format:transient</NameIDFormat>
        <AssertionConsumerService isDefault="true" index="0" Binding="urn:oasis:names:tc:SAML:2.0:bindings:HTTP-POST"
                                Location="https://localhost:9443/commonauth"/>
        <AssertionConsumerService index="1" Binding="urn:oasis:names:tc:SAML:2.0:bindings:HTTP-Artifact"
                                Location="https://localhost:9443/commonauth"/>
    </SPSSODescriptor>
    <RoleDescriptor xmlns:xsi="http://www.w3.org/2001/XMLSchema-instance"
                    xmlns:query="urn:oasis:names:tc:SAML:metadata:ext:query"
                    xsi:type="query:AttributeQueryDescriptorType"
                    protocolSupportEnumeration="urn:oasis:names:tc:SAML:2.0:protocol"></RoleDescriptor>
    <XACMLAuthzDecisionQueryDescriptor WantAssertionsSigned="false"
                    protocolSupportEnumeration="urn:oasis:names:tc:SAML:2.0:protocol"></XACMLAuthzDecisionQueryDescriptor>
</EntityDescriptor>

Name in Assertion: http://wso2.org/claims/emailaddress
Local Attribute Name: mail


9. Select Federation link


10. Select "WSO2" Service Provider

 
11.  Add extra nameid-format "urn:oasis:names:tc:SAML:2.0:nameid-format:unspecified"


12. Create a new User in OpenAM


13. WSO2 Identity Server configuration

Create a Identity Provider --> Federated Authenticators --> SAML2 Web SSO Configuration 

Identity Provider Entity Id: test (can be any name)

Service Provider Entity Id: wso2 (This should be same as Remote Service Provider meta data "entityID")

SSO URL: http://openam.example.com:8080/OpenAM-13.0.0/SSORedirect/metaAlias/idp (You can find this end point from Hosted Identity Provider "services" tab)

Logout Url: http://openam.example.com:8080/OpenAM-13.0.0/IDPSloRedirect/metaAlias/idp1 (You can find this end point from Hosted Identity Provider "services" tab)


14. Register a Service Provider and do SAML SSO configuration according to [2]. From claim configuration select "http://wso2.org/claims/emailaddress" as "Subject Claim URI"


15. Try to Log into travelocity sample application, you will be prompted OpenAM login page as below.  Enter newly created user credentials so you can log into travelocity sample application.


[1] https://backstage.forgerock.com/#!/docs/openam/13/getting-started

[2] https://docs.wso2.com/display/IS510/Configuring+SAML2+Web+Single-Sign-On

Saturday, May 7, 2016

JWT Grant type for Native mobile application Authentication and Authorization with WSO2 Identity Server and WSO2 API manager

Background

At the beginning you might start WSO2 Identity Server with SAML2 protocol for authentication, authorization and Single Sign On in web application context. Once WSO2 API manager came into picture you might have to invoke secure APIs without reauthenticating since you have already authenticated with SAML2 and you have SAML assertion in your hand. In order solve this problem you can use SAML2 Bearer grant type [1].

After some time with the rapid use of mobile applications you might have to implement your web application functionalities as a native mobile application. When it comes to native mobile applications manipulating XML based SAML requests and responses is not that much effective since mobile applications have limited processing power. In order to address new requirement JWT grant type would be an ideal solution. JWTs represent a set of claims as a JSON object that is encoded in a JWS and/or JWE structure.

Solution in a nutshell

Mobile application get JWT (ID token) generated by WSO2 Identity Server from password grant type. Mobile application exchange JWT token for access token in WSO2 API manager

Above solution applicable for WSO2 Identity Server 5.0.0 or higher versions and WSO2 API manager 1.10.0

WSO2 Identity Server Configuration


2. Use this CURL command to obtain ID Token from password grant type

curl -v -X POST --basic -u 4ukcHRoYnNmWDO15tLDfvcoz7BIa:FEUMUvhe0iTCpOMa8wyMKYqWBCYa -H "Content-Type:application/x-www-form-urlencoded;charset=UTF-8" -k -d "grant_type=password&username=admin&password=admin&scope=openid" https://localhost:9444/oauth2/token

Response

{"scope":"openid","token_type":"Bearer","expires_in":3600,"refresh_token":"59542c6864fcf4505a09981607f9d7d2","id_token":"eyJhbGciOiJSUzI1NiJ9.eyJhdXRoX3RpbWUiOjE0NjI2MTM4NDEsImV4cCI6MTQ2MjYxNzQ0MSwic3ViIjoiYWRtaW4iLCJhenAiOiI0dWtjSFJvWW5ObVdETzE1dExEZnZjb3o3QklhIiwiYXRfaGFzaCI6Ikd4UFltYV94SkhoSTVhZHBnZWJNTXciLCJhdWQiOlsiNHVrY0hSb1luTm1XRE8xNXRMRGZ2Y296N0JJYSJdLCJpc3MiOiJodHRwczpcL1wvbG9jYWxob3N0Ojk0NDRcL29hdXRoMlwvdG9rZW4iLCJpYXQiOjE0NjI2MTM4NDF9.J3cgYKWKfCpxZKZD4uMUfSFl4Sd_Lo1qnSSlqnTYcynPs9bo5M3ErCmhObUuWleFr5Bnyg8cyeu8BokNr9vNqc_AnBG2KIPaWAA-BeRXl8ggxoWROP9U4Bs5aTsL2r1Z-Lf27cKTaLf4F6odincX8evnlL5fsqcYCws2T2DuU5E","access_token":"edc6193573e1a30318626c5161962808

Signed JWT

Format: <header>:<body>:<signature>

eyJhbGciOiJSUzI1NiJ9.eyJhdXRoX3RpbWUiOjE0NjI2MTM4NDEsImV4cCI6MTQ2MjYxNzQ0MSwic3ViIjoiYWRtaW4iLCJhenAiOiI0dWtjSFJvWW5ObVdETzE1dExEZnZjb3o3QklhIiwiYXRfaGFzaCI6Ikd4UFltYV94SkhoSTVhZHBnZWJNTXciLCJhdWQiOlsiNHVrY0hSb1luTm1XRE8xNXRMRGZ2Y296N0JJYSJdLCJpc3MiOiJodHRwczpcL1wvbG9jYWxob3N0Ojk0NDRcL29hdXRoMlwvdG9rZW4iLCJpYXQiOjE0NjI2MTM4NDF9.J3cgYKWKfCpxZKZD4uMUfSFl4Sd_Lo1qnSSlqnTYcynPs9bo5M3ErCmhObUuWleFr5Bnyg8cyeu8BokNr9vNqc_AnBG2KIPaWAA-BeRXl8ggxoWROP9U4Bs5aTsL2r1Z-Lf27cKTaLf4F6odincX8evnlL5fsqcYCws2T2DuU5E

Base64 decode of <header>:<body>

{"alg":"RS256"}{"auth_time":1462613841,"exp":1462617441,"sub":"admin","azp":"4ukcHRoYnNmWDO15tLDfvcoz7BIa","at_hash":"GxPYma_xJHhI5adpgebMMw","aud":["4ukcHRoYnNmWDO15tLDfvcoz7BIa"],"iss":"https:\/\/localhost:9444\/oauth2\/token","iat":1462613841}

Note: If you don’t see attribute “sub” please set subject claim uri from service provider claim configuration 


WSO2 API manager Configuration

  1. Install JWT grant type as a connector to API manager according to instructions provided in
Important: When you register Identity provider in API manager Identity provider name should be equal to value of issuer (iss) and Identity provider alias should be equal to audience (aud) value.

In this Sample

Identity provider name: https://localhost:9444/oauth2/token
Alias: 4ukcHRoYnNmWDO15tLDfvcoz7BIa

  1. After Installing JWT grant type for WSO2 API manager, publish and subscribe to API to get an Oauth application. 


  2. Now you can use this CURL command to get an access token from JWT grant type. Assertion is signed JWT obtained from Identity Server

curl -i -X POST -u  FIUK0c8VVJRIh_k3j3YPfXN6QnYa:VZXv9rCbZy89HHIkdC8Wb1SEQesa -k -d 'grant_type=urn:ietf:params:oauth:grant-type:jwt-bearer&assertion=eyJhbGciOiJSUzI1NiJ9.eyJhdXRoX3RpbWUiOjE0NjI2MTM4NDEsImV4cCI6MTQ2MjYxOTI5Niwic3ViIjoiYWRtaW4iLCJhenAiOiI0dWtjSFJvWW5ObVdETzE1dExEZnZjb3o3QklhIiwiYXRfaGFzaCI6Ikd4UFltYV94SkhoSTVhZHBnZWJNTXciLCJhdWQiOlsiNHVrY0hSb1luTm1XRE8xNXRMRGZ2Y296N0JJYSJdLCJpc3MiOiJodHRwczpcL1wvbG9jYWxob3N0Ojk0NDRcL29hdXRoMlwvdG9rZW4iLCJpYXQiOjE0NjI2MTU2OTZ9.O3A7o_8BX7rURBMI_2b62RMUs1x7gyOBKn5tW981AJrFMRPdtx9q4lnKkAFUEIr21H59GJv_3TOF-FfqNCIqdFPB97cmPN4wZsJwOumybv56tNil-fMNFGwcsMoaNxeP3Z4BahcQQ5g8WxzH0oPQZ5O-aNWx-62qNYblsENBiWw' -H 'Content-Type: application/x-www-form-urlencoded' https://localhost:9443/oauth2/token

Response

{"scope":"default","token_type":"Bearer","expires_in":3600,"refresh_token":"0ebd12b29b11e00555f68133f5bb1f48","access_token":"518bcb2fa8d83097622b89133066148b"}


[1] https://docs.wso2.com/display/AM1100/Exchanging+SAML2+Bearer+Tokens+with+OAuth2+-+SAML+Extension+Grant+Type

[2] https://docs.wso2.com/display/ISCONNECTORS/Configuring+JWT+Grant+Type


Saturday, January 16, 2016

Authentication using the Implicit Flow

OpenID Connect core specification [1] describe about core functionalities such as authentication built on top of OAuth 2.0 and the use of claims to communicate information about the End-User.
OpenID Connect core specification mainly focus for two main OAuth 2.0 grant types namely Authorization code grant type and Implicit grant type [2][3]. Up to Identity Server 5.0.0 only Authorization code grant type had OpenID Connect support but Implicit grant type hadn’t. With Identity Server 5.1.0 release OpenID Connect support added to Implicit grant type too. In other words Implicit grant type capable of returning ID Token. More Information about ID Token can find from here [4].

Basically implicit grant type support three different response types.

  1. token
  2. id_token
  3. id_token token

Please refer below sample requests and responses to see how each response type works.

  1. response_type=token

request

response

http://mycallbackurl#access_token=bb2157fce1266331c7802a8a1f6a33e1&token_type=Bearer&expires_in=3600

  1. response_type=id_token

request

response
http://mycallbackurl#id_token=eyJhbGciOiJSUzI1NiJ9.eyJzdWIiOiJhZG1pbkBjYXJib24uc3VwZXIiLCJhdWQiOlsiTmdUSUNYRlBZbnQ3RVRVbTZGYzhOTVU4SzM4YSJdLCJhenAiOiJOZ1RJQ1hGUFludDdFVFVtNkZjOE5NVThLMzhhIiwiYXV0aF90aW1lIjoxNDUyOTY5MDQ1LCJpc3MiOiJodHRwczpcL1wvbG9jYWxob3N0Ojk0NDNcL29hdXRoMlwvdG9rZW4iLCJleHAiOjE0NTI5NzMwMDQsIm5vbmNlIjoiYWJjIiwiaWF0IjoxNDUyOTY5NDA0fQ.BVH6ZeWhz4Hqji3YD1mdjMK-qxGwDDAndRzPqitOtZ0IhyXS8aeUrMWlMnazTJjilC1Dd_j6JjRh1hi1ee090KMEZnJ5Oung1Cw-vNGLDKtVzGwKVqRe9HbW9FkSrhXW5JOuR4sl-WQjr_3Ab0KVkgsammf0nDVEse_wSFrh5jA

Please note nonce value is mandatory parameter here and if didn’t provide scope=openid you won’t get Id Token.

Base64 decoded value of Id Token

{"sub":"admin@carbon.super","aud":["NgTICXFPYnt7ETUm6Fc8NMU8K38a"],"azp":"NgTICXFPYnt7ETUm6Fc8NMU8K38a","auth_time":1452969045,"iss":"https:\/\/localhost:9443\/oauth2\/token","exp":1452973004,"nonce":"abc","iat":1452969404}

Id Token does not contain at_hash value since no access token is generated (access token is required to calculate at_hash value)


  1. response_type=id_token token

request

response

Please note nonce value is mandatory parameter here and if didn’t provide scope=openid you won’t get Id Token.

{"at_hash":"dO0wWNbHEdVOewSHlVFzfw","sub":"admin@carbon.super","aud":["NgTICXFPYnt7ETUm6Fc8NMU8K38a"],"azp":"NgTICXFPYnt7ETUm6Fc8NMU8K38a","auth_time":1452970406,"iss":"https:\/\/localhost:9443\/oauth2\/token","exp":1452974006,"nonce":"abc","iat":1452970406}

Id Token contains at_hash value since access token is generated.


[2] http://openid.net/specs/openid-connect-core-1_0.html#CodeFlowAuth


[4] http://openid.net/specs/openid-connect-core-1_0.html#IDToken